
Creating a Delayed GoPhish Server
This guide will not only teach the basics for setting up a GoPhish sever in your Ubuntu environment, but will also look at ways around some of those nasty limits implemented on hosting sites such as Hostgator when trying to conduct a phishing test for a client with a large number of employees.
1. Setup the Environment
Simple I know, but some of the dependencies and requirements for this venture will not come with Ubuntu out of the box so you will need to grab a few things before getting started with your terminal:
The latest version of GO:
sudo apt-get install golang-go
Postfix SMTP Service Sudo apt-get install postfix
During postfix installation just select the defaults as we will be changing these shortly.
**Note**
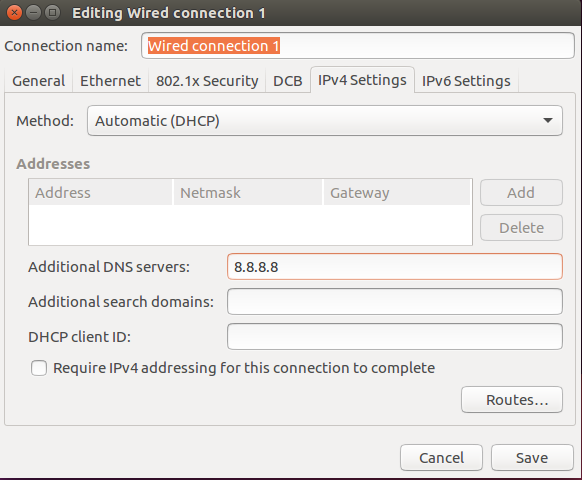
Don't forget to setup your network properly before continuing any further. If you are using DHCP on a virtual machine you should be fine. If you need to setup statically, make sure to do so and test your internet connection before proceeding. Pinging 8.8.8.8 and google.com from terminal will confirm that everything is working as intended. If you cannot ping google.com, make sure you edit your connections by clicking the connection in the top right section of your machine and using the drop down, select edit connections. Then select your connection of choice and click edit. After this add 8.8.8.8 or your DNS of choice to the additional DNS servers section. Then save and try again. This is one of the most common issues I see from others setting up their Ubuntu environment.
If this is not done before installing Postfix, it will copy your /etc/resolv.conf settings to its own resolv.conf which you then have to manually edit but we will look at that shortly.
2. Install and Setup GoPhish
This will require some modifications to the default GoPhish files after setup so here we will look at some of these settings and how to setup our first campaign.
First off, head on over to the GoPhish Download and get the latest version for your machine. You can simply download the zip file directly to your downloads directory or if you are a fan of git, use the proper commands to download the latest version. Once downloaded, create a new folder in your downloads and unzip the contents of the gophish-v.x.x.x-linux-64bit.zip to it. (for the example I am using version 0.6.0 on a 64bit system)
unzip gophish-v0.6.0-linux-64bit.zip -d /GophishWith GoPhish unzipped and ready to go, go ahead and make sure you run the gophish program:
sudo ./gophish
Once running, navigate to https://localhost:3333 and login to your new phishing environment. (Default credentials are admin/gophish)
**Note**
If you see a bunch of fun symbols instead of the GoPhish login page, you probably navigated to the http and not https section. This is a common mistake, just make sure you are going to https. Also you may ignore the connection not secure warning form your browser.
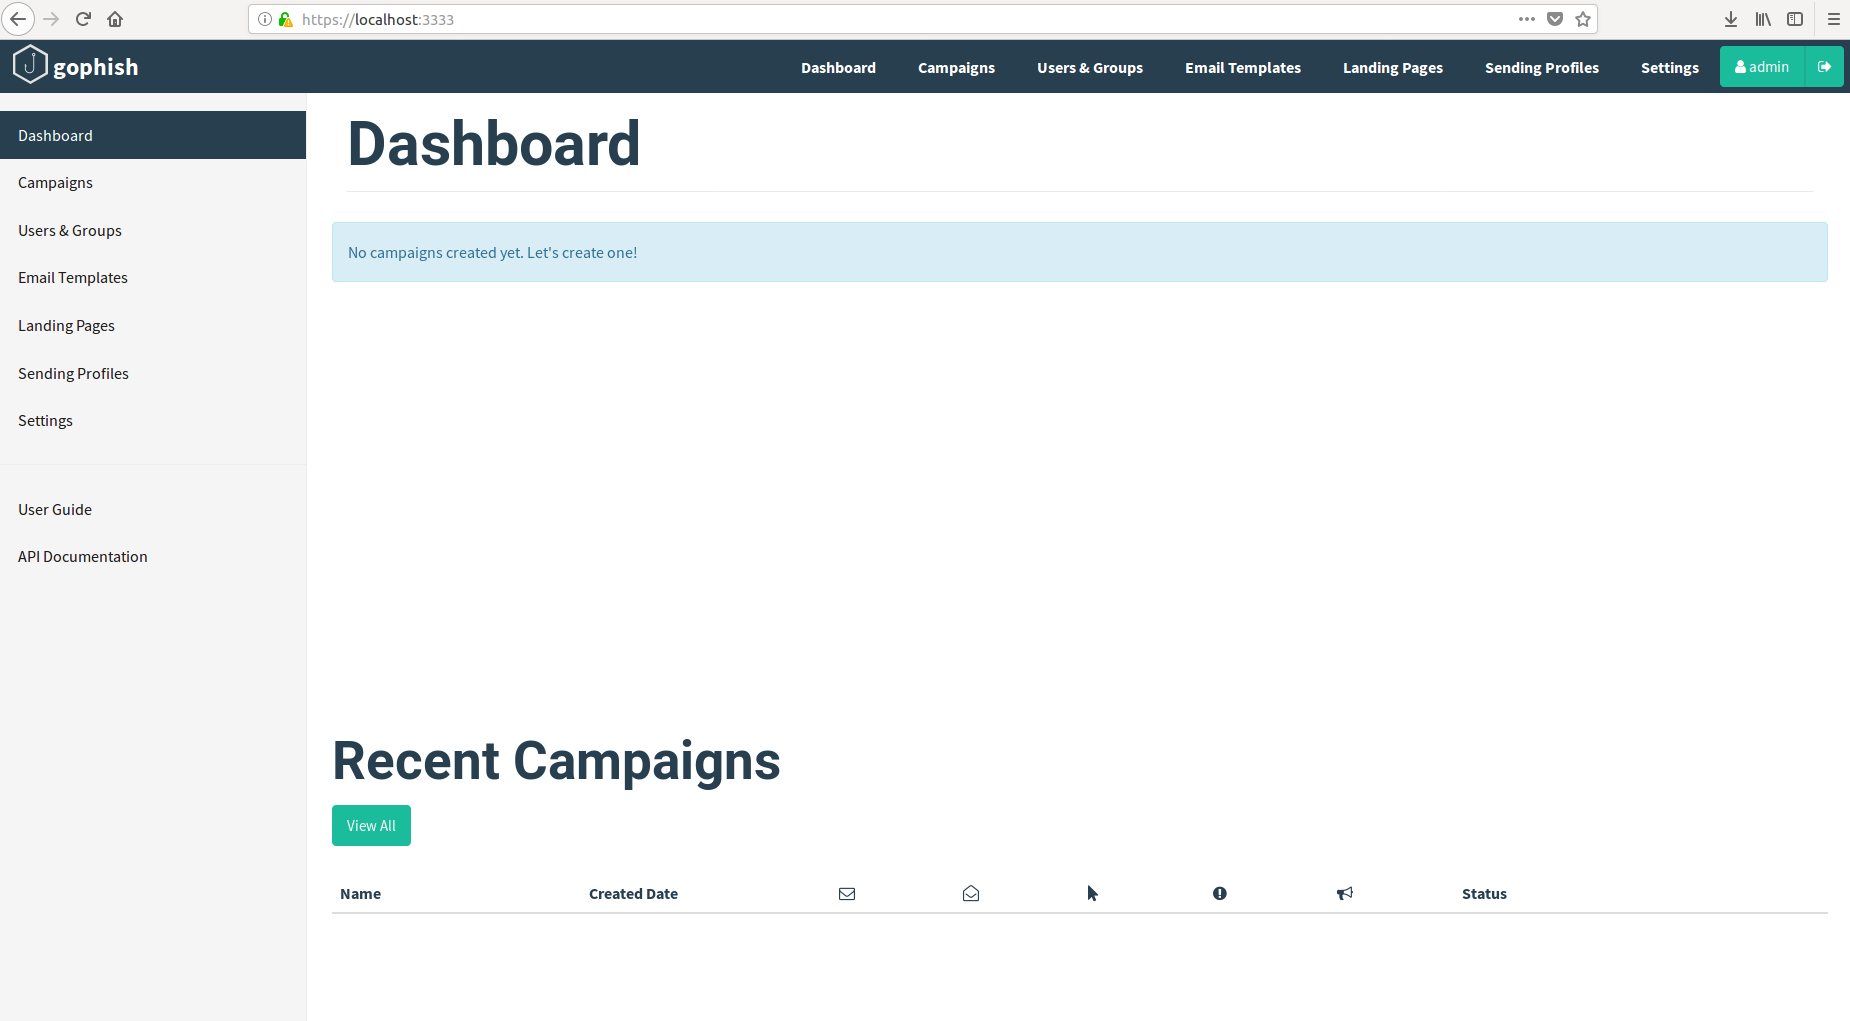
Once logged in, take a look around and familiarize yourself with the setup. It is fairly straightforward but can take a little learning to navigate quickly. Once you feel comfortable with the setup, head over to the landing pages and get ready to create your first template.
Let's start by looking at the landing page section. This is a very fun area to play in and while HTML experience is a big plus here in customization efforts, you can easily make pages without the need to use HTML. The import site button will allow you to import sites and can be used if you are using a custom portal used by a client. For the sake of example, we are going to use the Facebook login page. Simply navigating to Facebook.com while logged out and copying the link to the import site section https and all will yield this.
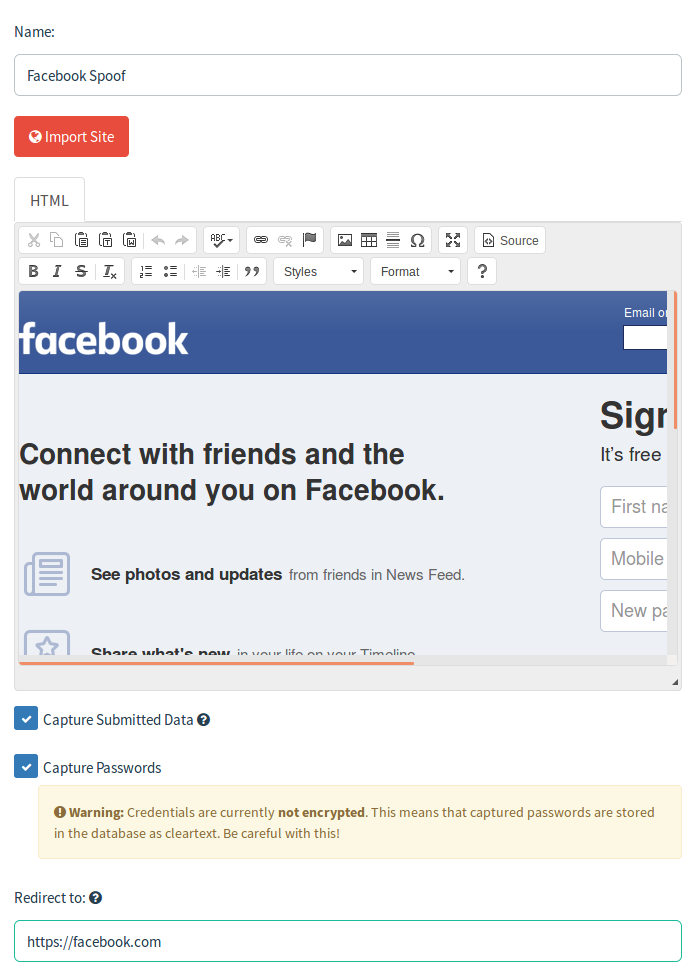
With the page copied, note that it wont be full screen so you have to scroll to see everything, you can also capture submitted data and passwords. These features will capture the data submitted and can be used both as proof of your simulated attack or for password analysis.
**Note**
Another common mistake is with landing pages and the redirect feature. This should be set to the FULL URL of the site you have faked or wherever you want users to be redirected to. simply putting facebook.com will redirect to your campaign/facebook.com and will result in an error on the users end. Instead, using https://facebook.com will redirect to the original site. Also, here is where HTML coding will come in handy as there are many specific sites that do not like to be replicated and leave bits in their code that will check for pages like the one you are making and then warn users. This can be used as a tell for new clients or edited to removes these checks by using the source section of the page pictured above to manually remove these checks.
There is an issue where GoPhish may not capture submitted credentials based on the source if you are using the import feature. There is a thread in the GoPhish Github issues section that details a fix but you may need to dive a little into some HTML to find the area needed and edit/test this. Big shoutout to S0larflare to recognizing and providing a fix.
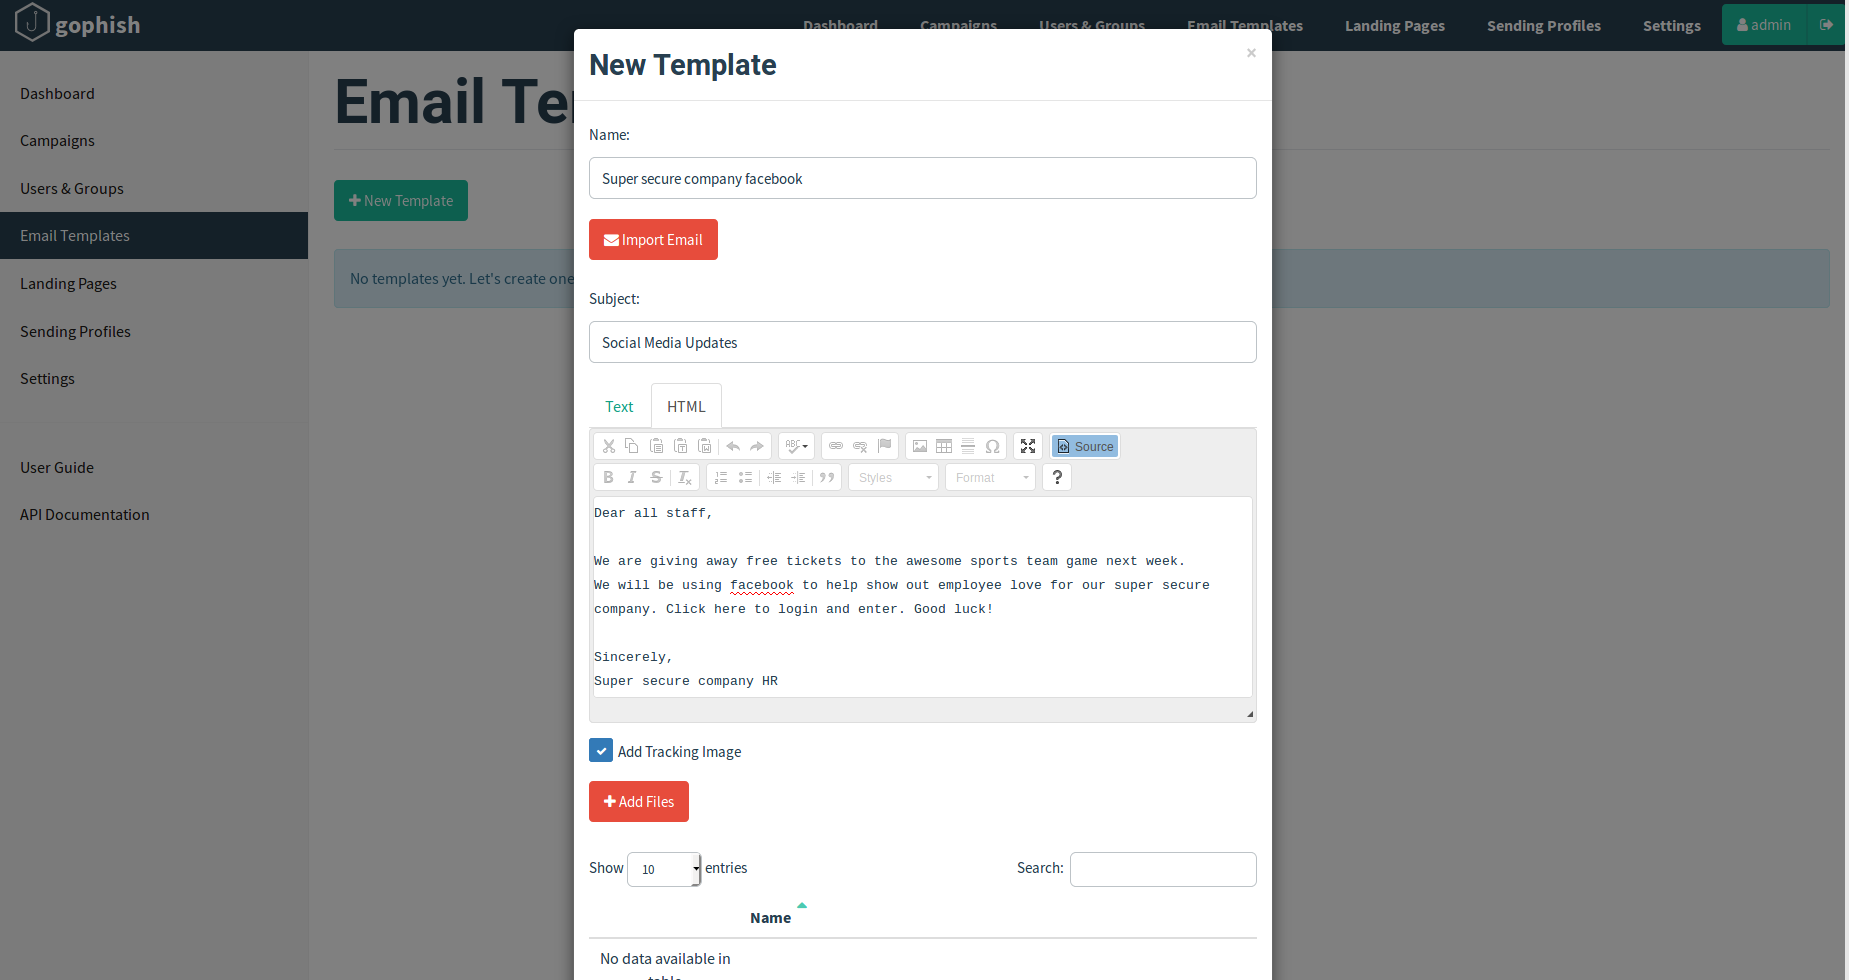
Next we will look at the New Template section which allows you to craft your email and even better, allows you to import emails. To import, simply take an email and (in Gmail) click the drop down and select view source. Copy this code into the import section and you have an nice copy to start from. Crafting emails with this page is very similar to creating your landing page and can be done with HTML code or by typing in the box. This is where your personal creativity comes into play. How will you entice users to click the link. Giveaways? Updates? So many options!
The Users and groups section is fairly straightforward and allows you to import users either individually or in bulk. When in bulk it only accepts certain formats and be sure to use the proper heading before each section to specify the difference between emails, names, etc.
I strongly recommend using this to create a group of only you and those working the project to allow quality testing prior to sending out your campaign. This will allow you to ensure that emails are delivered, bypass spam filters, redirect properly, connect to landing pages, and capture credentials.
The next step is the one that will give you a small edge. Using the domain host of your choice, register a domain that looks like the target you are aiming for. For example, for supersecure.com we might choose something like supersecures.com. Some of these may not be available but keep trying as this will help your campaign a lot. Once you buy the proper domain (they are usually pretty cheap) make sure you edit the A record in DNS to point towards the IP address of your gophish server. Each domain host has different ways of doing this. If my server was 1.2.3.4, that is where I would point this so that everything work properly. Also, you will need to create an email account with the domain, use the one that you are trying to replicate. If you are pretending to be the HR department HR for the username is good bet, or you can use some information gathering such as the targets website or LinkedIn to try and find the director of HR. Make sure this technique is disclosed prior to sending as some clients may not take too kindly to this approach.
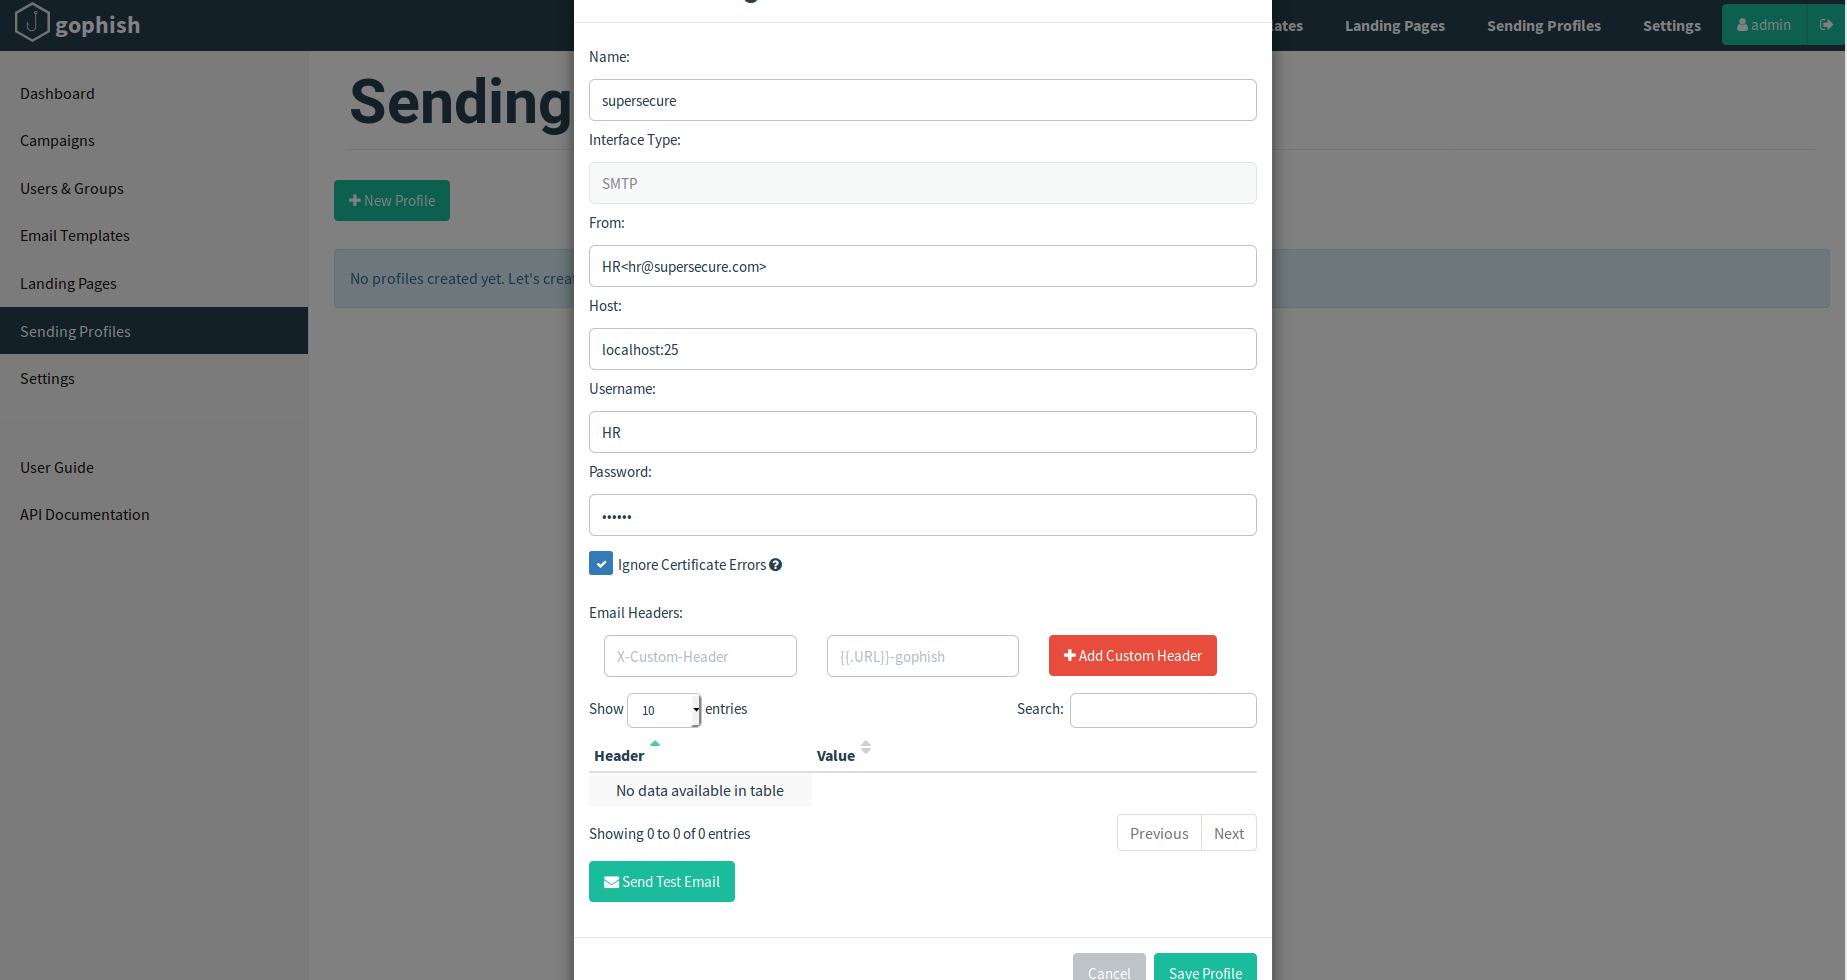
Once you have done this, put the from section of the sending profile to how you would like it to appear, set your host to localhost:25, username to the username created (HR in our example) and put in the password for the account. This will allow GoPhish to send out the messages from the account you created.
3. Configure Postfix
Postfix has some neat features we can implement for the phishing test and most importantly, can be modified to allow a delay for messages headed to the same domain. If your client has a list of employees they want targeted in your phishing attack all located @supersecure.com then you will be in luck when it comes to avoiding any email limits placed by your domain host. We will also look into some of the features that will likely have to be modified between engagements to help ensure the best results.
With postfix previously installed you can find the major files of interest in two sections. One being your /etc/postfix/ directory which will hold you important files such as main.cf, sasl_passwd, and sasl_passwd.db files. The second location is your /var/spool/postfix/ directory which will house the etc directory holding the resolv.conf file we spoke of earlier. If you have DNS issues when sending mail this is a likely culprit so make sure you have the DNS set properly in there as well.
If you look closely you will notice that you have no sasl_passwd or sasl_passwd.db files in your /etc/postfix/ directory. To fix this we are going to create these on our own. First create the sasl_passwd file with the editor of your choice (I prefer vim).
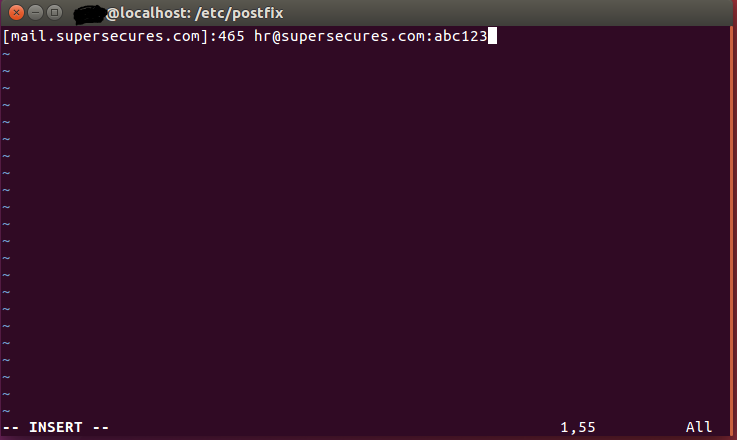
sudo vim /etc/postfix/sasl_passwdThis is where some knowledge about your domain will come in handy. for hostgator, the port for mail is 465 so make sure you do your homework and add the proper information this section as it will allow the connection between postfix and your host. You will be replacing the domain with your domain name, the email address with the one you created, and after the ":" you will put your password. After this, save the file and you are one step closer.
Next we will make the sasl_passwd.db file. This will require the following line of code while in the /etc/postfix/ directory.
sudo postmap sasl_passwdOnce done, you will have your sasl_db created. A note here is that is any changes are made to the sasl_passwd file either because you are doing a new engagement or had an error in the file, you should delete the sasl_passwd.db file and redo the postmap command on the updates sasl_passwd file.
Next you will edit your main.cf file in the same directory to reflect the target and add some information. First, add to the relayhost section to have the same information as the first part of your sasl_passwd file as pictured below. This will change with different engagements much like your sasl_passwd file does.
After that, you should add all of the lines at the bottom that are likely not present in your file. These are at the bottom of the file and will give you a better time when it comes to working with postfix.

Also make sure you have a certificate that exists in the /etc/ssl/certs/ directory and if it does not exits, make sure you create one.
The last section of interest and the whole point of using postfix for this is the default_destination_rate_delay. This will allow you to manually put a delay in when phishing a lot of people on the same domain. That means, when we send mail to everyone at @supersecure.com we will have a small delay between each message. You may need to do some homework here as well because sending with hostgator allows 500 messages per hour and other domain hosts have more or less on their limits. Make sure you understand the limit and change your rate accordingly. For hostgator, a 10 second delay will stagger the emails long enough to allow all emails to go out without any issues. If your target is 600 employees, this will take about 2 hours. This is one of those instances where you will actually use the "Jack has a ludicrous amount of apples, how many can he throw in an hour if he throws them at a rate of 1 every second" scenario from math class.
**Note**
The delay needs to be changed to s or m after the number to denote minutes or seconds, a 1 minute delay on 600 messages will not be fun.
With everything setup go ahead and restart postfix so that the new settings are ready to go.
sudo postfix reloadWith that done you can go back to GoPhish and start building your campaign from the parts created earlier. Simply go to campaigns, start a new campaign, and populate the template, landing page, groups, and sending profile with what you created earlier. Make sure you put the URL to the domain you bought which should be pointing to your gophish server by now, for the example it would be supersecures.com.

Once set, it is again advised to send the first campaign only to yourself and those involved with the project to look for any errors or issues with the campaign. Once satisfied it is very easy to use GoPhish to create a new campaign with the same settings.You can monitor your campaign from either the dashboard or your campaigns tab to keep track of who opened the email, clicked the link, and submitted credentials. You can also view submitted credentials using the campaign tab.
One last section of monitoring will be your mail log files in Ubuntu. Just before launching your campaign, in your terminal go to /var/log/ and use the following command to watch the log files.
tail -f mail.logThis will not only show you the mail as it is in queue and sent out, but also you can look for errors here or if you are getting bombarded with errors also check the mail error log in the same directory for troubleshooting purposes.
With all of that you are now ready to start some of your first campaigns.
Happy Phishing!